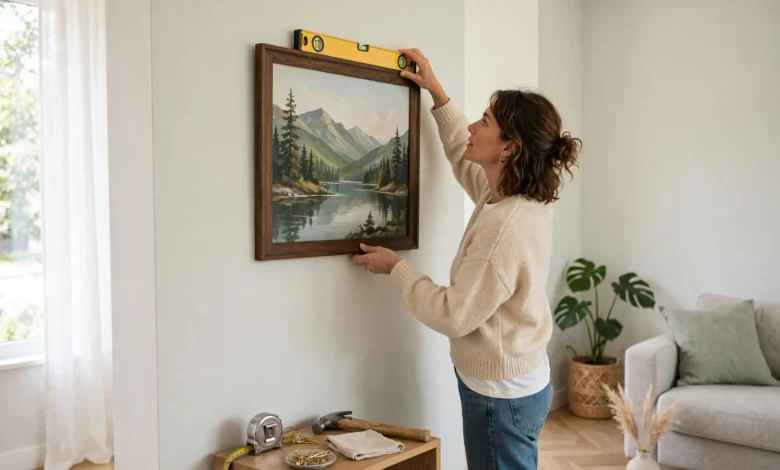
Learning how to hang a picture properly takes about fifteen minutes, a handful of cheap tools, and one piece of knowledge most people skip: the fixing has to match the wall, not just the frame. A light print on drywall needs nothing more than a picture hook and a nail, a heavy mirror on the same wall needs a proper anchor or a screw driven into a stud, and a brick wall needs a masonry drill and a wall plug before anything else will hold. Get that one decision right, hang the centre of the picture at roughly eye level, and check it with a spirit level, and the result will look like a professional did it. This guide walks through every step in order, from choosing hardware to fixing the crooked frame that keeps drifting sideways.

The reason so many pictures end up crooked, or worse, on the floor, is rarely bad luck, and it is almost always one of three mistakes: the wrong fixing for the wall type, a single nail carrying far more weight than it was designed for, or a measurement taken by eye instead of with a tape measure. None of those mistakes is hard to avoid once you know what to look for, and none of them needs specialist skill or expensive equipment. Whether you are hanging your first framed print in a rented flat or building a gallery wall in a home you own, the method below works for light frames, heavy mirrors, and everything in between, and it will keep your walls in good shape at the same time.
How to Hang a Picture: The Short Answer
How to hang a picture in five steps: weigh the framed picture, work out what your wall is made of, choose a fixing rated for at least that weight, mark the hanging point so the centre of the frame sits at about eye level, then fit the fixing, hang the frame, and check it with a level. For a light frame under about five pounds on drywall, a single angled picture-hook nail is enough, while anything heavier needs a wall anchor, and anything over about 25 pounds should ideally be screwed into a wall stud or hung from two fixings that share the load. On brick or concrete, you will need a masonry drill bit and a wall plug instead of a nail, and on old plaster walls you should drill carefully and avoid hammering, which can crack the surface. That is the whole job in miniature, and the rest of this guide simply explains each step properly so nothing goes wrong.
The single most useful rule in picture hanging comes from the experts at This Old House, who advise dividing a wall anchor’s rated shear load by four to find its safe working load, so an anchor rated for 100 pounds will safely support about 25 pounds in real use. That four-to-one safety margin exists because ratings are measured under ideal laboratory conditions, while your wall, your drilling, and your frame are all real-world variables that reduce the true holding power. Applying that rule immediately tells you whether one fixing is enough or whether you need two, and it is the reason experienced hangers are cautious about heavy mirrors and large canvases even when the packaging claims a generous weight limit. When in doubt, go stronger, spread the load across two points, and never trust a single small nail with something you would be upset to see fall.
What You Need Before You Start
A good picture-hanging kit fits in a small box and costs very little, yet having the right tools ready before you start is what separates a ten-minute job from an afternoon of frustration. At minimum you will want a tape measure, a pencil, a spirit level (a small one is fine, though a longer level gives a truer reading across a wide frame), a hammer, a stud finder if you have drywall, and the fixings themselves, which might be picture hooks, screws, wall anchors, or adhesive strips depending on the wall and the weight. A drill with the right bits is essential for brick, concrete, and for fitting anchors in drywall, and a roll of painter’s tape is surprisingly useful for marking positions without leaving marks on painted walls. Laying everything out on a table before you pick up the frame also gives you a chance to inspect the back of the frame itself, which is where many hanging problems actually begin.
Before you touch the wall, look at the back of your picture and decide how it is meant to hang, because the hardware on the frame dictates the hardware on the wall. Most frames come with one of four fittings: a sawtooth hanger, a wire strung between two D-rings, two D-rings on their own, or a keyhole slot, and each one behaves differently once it is on the wall. Sawtooth hangers are fine for very light frames but let the picture slide sideways easily, wire gives you flexibility but makes levelling fiddly, and D-rings, fitted about a third of the way down from the top of the frame on each side, give the most stable and level result. If your frame has a flimsy fitting or a frayed wire, replace it now, because a five-minute fix at the table is far better than discovering the problem after you have already drilled a hole in the wrong place.
How to Hang a Picture on Drywall
How to hang a picture on drywall depends almost entirely on weight, because drywall itself is just a sheet of gypsum board that cannot hold much on its own, and the strength comes from what is behind it. A simple nail will hold roughly five to ten pounds in drywall, which covers small prints and light frames, and a proper picture-frame hanger with an angled nail can support up to about 20 pounds, according to This Old House, because the angle drives the nail into the board in a way that resists pulling out. For anything between 25 and 50 pounds, you need a flat-mounted hook fitted with a wall anchor, and for anything heavier than that, you should either find a stud and screw directly into the solid timber or use toggle bolts, which spread the load across a much larger area of the board from behind. The mistake to avoid is assuming that a bigger nail solves a heavier picture, because it does not, and the nail will eventually tear through the board.
Finding a stud is the single best upgrade you can make to a heavy hang, and a stud finder takes the guesswork out of it entirely, though there are low-tech tricks if you do not own one. Move the finder slowly across the wall until it signals, then mark both edges of the stud and aim for the centre, or knock along the wall and listen for the change from a hollow sound to a dull, solid one, which marks the timber behind the board. Studs in most modern homes sit 16 inches apart, measured centre to centre, and electrical socket boxes are usually fixed to a stud, so finding one socket gives you a starting point for measuring to the next. Once you have a stud, drive a long screw straight into it, test it with a firm tug, and you have a fixing that will hold a heavy mirror for decades without any anchor at all, which is why professionals always look for the stud first.
How to Hang a Picture on Brick, Plaster and Concrete
How to hang a picture on a brick or concrete wall starts with accepting that nails and ordinary screws will not work, because masonry is far too hard and will either bend the nail or shatter the surface. Instead, you need a power drill fitted with a masonry bit, a plastic wall plug, and a screw, in that order: mark the spot, drill a hole to the depth of the plug, tap the plug in gently until it sits flush, then drive the screw into the plug so it expands and grips the inside of the hole. The drill bit size is printed on the plug packaging, and getting it right matters, because a hole that is too wide leaves the plug loose and a hole that is too narrow will not accept it at all. Older houses sometimes have brittle cement render over the brickwork that can crumble when drilled, so drill slowly, let the bit do the work, and stop if the surface starts to flake.
Plaster walls, especially the old plaster-and-lath type found in period homes, need a gentler touch again, because hammering a nail into them can crack the plaster across a wide area and leave a repair job far bigger than the picture was worth. The safest approach is to drill a small pilot hole first, then fit a screw or a plaster-specific anchor, and to avoid hanging anything heavy from a single point in old plaster without finding the timber behind it. Before you drill into any wall, it is essential to know where the pipes and electrical cables run, because drilling into a live cable or a water pipe turns a simple job into a dangerous and expensive one, so use a cable and pipe detector if you have any doubt, and never drill directly above or below a socket or a switch. A few minutes of checking is always cheaper than the alternative, and it is the step most often skipped by people in a hurry.
How High Should a Picture Hang?
The height question has a surprisingly settled answer in the art world, where galleries and museums hang pictures so that the centre of the artwork sits at about 57 inches, or 145 centimetres, above the floor, which is roughly the average person’s eye level. That 57-inch rule is a starting point rather than a law, and it works because it puts the picture where people naturally look without tilting their heads up or down, which is why it has survived as the standard for so long. In a room with unusually high ceilings, you can raise the centre a few inches, and in a room where people mostly sit, such as a dining room, you can lower it slightly, but moving far from eye level is what makes a picture feel wrong even when it is perfectly straight. The most common beginner error is hanging pictures too high, usually because the hanging point was measured from the top of the frame instead of from its centre.
When a picture hangs above furniture, the furniture sets the height instead of the floor, and the usual guidance is to leave a gap of roughly six to eight inches between the top of the sofa or sideboard and the bottom of the frame. That gap is small enough for the picture and the furniture to read as one arrangement, rather than two unrelated objects floating on the same wall, and it stops the picture from feeling disconnected from the room below it. For a group of pictures, the same rule applies to the group as a whole, so work out the centre of the entire arrangement first, place that at eye level, and then build the individual frames around it. Measuring twice and marking the wall in pencil before you drill anything is the habit that saves the most time, because a pencil mark can be erased in seconds while a wrongly drilled hole cannot.
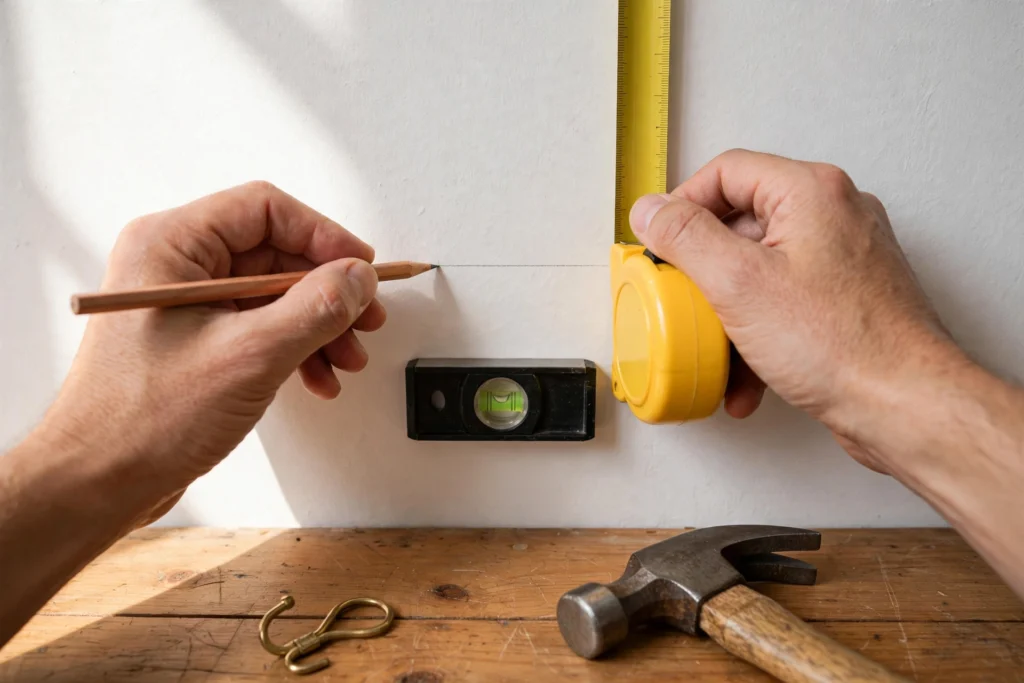
The measuring itself is straightforward once you know the one calculation that matters, which is the distance between the hanging point on the back of the frame and the top of the frame. If your picture hangs from a wire, pull the wire up to its highest point and measure from that point to the top of the frame, then add that distance to your chosen centre height to find where the hook goes on the wall. If it hangs from D-rings or a sawtooth, measure from the fixing to the top of the frame in the same way, and transfer that measurement to the wall with the tape measure held level. Doing the arithmetic on paper first, rather than holding the frame up with one hand and guessing with the other, is the difference between a picture that lands exactly where you wanted it and one that ends up two inches too high and needs a second hole.
How to Hang a Picture Straight and Keep It Straight
Getting a picture level is easy with a spirit level, and keeping it level is a separate problem that comes down to how the frame is attached to the wall. Hold the level along the top edge of the frame, adjust until the bubble sits exactly between the lines, and then step back and check it with your eyes, because a level can be right while the picture still looks wrong if the ceiling or the floor is not itself level, which is common in older houses. A longer level, two feet or more, gives a truer reading across a wide frame than a short one, and a laser level is even better for lining up several frames at once, because it projects a straight line across the whole wall that you can align everything against. If you are hanging a group, level the first frame carefully and use it as the reference for the rest, rather than levelling each one in isolation.
The reason pictures drift crooked over time is usually that they hang from a single point, which lets the frame swing like a pendulum whenever someone walks past, closes a door, or bumps the wall. Two fixing points solve this completely, because a frame hung from two hooks or two D-rings cannot rotate, and it is the single most effective trick for pictures that keep tilting. Small adhesive felt pads or rubber bumpers stuck to the bottom corners of the frame also help, because they grip the wall slightly, protect the paint from scratches, and stop the frame from swinging on its fixing. If your picture has a wire, keep the slack modest, because a wire with too much slack lets the frame sit low and swing freely, while a wire pulled too tight puts unnecessary strain on the fittings, and the sweet spot is a gentle curve that keeps the wire hidden behind the top of the frame.
Hanging Heavy Pictures and Gallery Walls
Heavy pictures, mirrors, and large canvases deserve a different approach from light prints, because the consequences of a failure are much worse, and the fixings need to be chosen with that in mind. Anything over about 25 pounds should be hung from two points at minimum, ideally screwed into studs, or fitted with toggle bolts or molly bolts if no stud is available, and the French cleat method is the professional choice for very heavy or wide pieces, using two interlocking bevelled strips of wood that distribute the weight evenly across the wall. This Old House’s own testing found toggle bolts to be the workhorses of the heavy-duty options, able to hold the heaviest loads of any anchor type, and their rule of thumb is that your anchors should be rated to hold four times the weight of the object you are hanging. That sounds cautious until you remember that a falling mirror can injure someone and destroy a floor, at which point caution looks like common sense.
Gallery walls, where several pictures hang together as one display, are best planned on the floor before anything goes on the wall, because rearranging frames on carpet is free while rearranging holes in plaster is not. Lay the frames out on the floor in the arrangement you want, leaving consistent gaps of roughly two to three inches between them, then trace each frame onto paper or cut paper templates to the same size and tape them to the wall, which lets you step back, live with the layout for a day, and move the templates until it feels right. If you want more inspiration for wall displays, our guide to creative bulletin board ideas shows how teachers arrange boards that stay neat and eye-catching, and the same spacing and grouping principles work just as well for pictures at home. Start with the largest frame in the centre or slightly off-centre, build outwards from there, and keep the centre of the whole group at eye level, just as you would for a single picture. Once the templates are in place, mark the hook positions through the paper, remove the templates, and hang each frame in turn, checking the level as you go rather than at the end.
Mistakes That Damage Walls (and How to Avoid Them)
The most expensive picture-hanging mistakes are not the crooked ones but the ones that damage the wall, and almost all of them come from rushing the preparation. Drilling without checking for pipes and cables is the worst of these, followed closely by hammering nails into old plaster, which can crack across a wide area, and by using the wrong drill bit on masonry, which can shatter render or leave a hole too wide for its plug. Over-tightening screws in drywall anchors is another quiet culprit, because it strips the anchor’s grip and leaves a fixing that feels solid until the moment it is loaded. The fix for all of these is the same: slow down, check what is behind the wall, use the bit and the fixing the manufacturer specifies, and stop as soon as the fixing feels snug rather than forcing it further.
Rented homes add a second set of concerns, because the goal is to hang pictures without leaving any trace when you move out, and that is where adhesive hanging strips earn their place. Modern adhesive strips have improved considerably and can hold light to medium frames reliably, provided the wall is clean, dry, and smooth, and provided you follow the weight rating exactly rather than treating it as a rough guide. They do not work well on textured walls, damp walls, or freshly painted surfaces, and they should never be trusted with a heavy mirror or anything above a doorway, but for prints and small frames in a rental they are the best no-damage option available. When you remove them, pull the tab straight down slowly, exactly as the instructions say, because yanking the strip off sideways is what pulls the paint with it, and the removal technique matters as much as the product itself.
Conclusion
Hanging a picture well comes down to three decisions made in the right order: choose the fixing for the wall and the weight, place the centre of the frame at eye level, and use two fixing points whenever the picture is heavy enough to matter. Everything else in this guide, from finding studs to planning a gallery wall on the floor, is a refinement of those three decisions, and none of it requires specialist skill or expensive tools. The difference between a picture that looks professionally hung and one that looks like an afterthought is rarely talent, and it is almost always preparation, because the person who measures, marks, and checks before drilling gets a better result than the person who holds the frame up with one hand and guesses with the other, however good their eye is.
So take the fifteen minutes, gather the tools, weigh the frame, and work out what your wall is made of before you make a single hole. Your picture will sit straight, it will stay straight, and your wall will still look good when the picture eventually comes down. That is really all there is to it, and once you have done it properly a couple of times, it becomes one of those small household skills you never have to think about again, which is exactly how it should feel. As of November 2026, the hardware and the methods described here are the standard ones used by professionals and DIY guides alike, and they will serve you well in any home, on any wall, with any frame.
How to hang a picture without nails?
You can hang a picture without nails by using adhesive hanging strips, which are the most reliable no-damage option for light to medium frames on smooth, clean, dry walls. Choose strips rated for at least the weight of your framed picture, clean the wall with a dry cloth, press the strips firmly onto the back of the frame and then onto the wall, and wait the time stated on the packet before hanging the frame. Adhesive strips work best on painted drywall and smooth plaster, but they are not suitable for textured walls, damp surfaces, or heavy mirrors, and you should always remove them by pulling the tab straight down slowly, exactly as instructed, to avoid pulling paint off the wall.
How high should I hang a picture above a sofa?
A picture above a sofa should hang with a gap of roughly six to eight inches between the top of the sofa and the bottom of the frame, and the centre of the picture should sit at about eye level, around 57 inches or 145 centimetres above the floor. That gap is small enough for the picture and the sofa to read as one arrangement, rather than two unrelated objects on the same wall, while still leaving enough breathing room for cushions and for people leaning back. If the picture is very wide, it should span roughly two-thirds of the width of the sofa, and if you are hanging a group of pictures, apply the same gap and centre-height rules to the group as a whole rather than to each frame individually.
What is the best anchor for a heavy picture?
The best anchor for a heavy picture is a toggle bolt, which spreads the load across a large area of the wall from behind and holds the heaviest loads of any common drywall anchor, according to testing by This Old House. For pictures over about 25 pounds, screwing directly into a wall stud is even better, because the screw bites into solid timber rather than relying on the board at all, and a French cleat is the professional choice for very heavy or wide pieces such as large mirrors. Whatever anchor you choose, apply the safety rule of dividing its rated load by four to find its safe working load, so an anchor rated for 100 pounds should be trusted with about 25 pounds, and use two fixings rather than one to stop the picture from tilting.
How do I hang a picture on a plaster wall?
To hang a picture on a plaster wall, drill a small pilot hole first rather than hammering a nail, because hammering can crack old plaster across a wide area and leave a repair that is far bigger than the picture. Use a plaster-specific anchor or a screw driven into the timber behind the plaster, and for heavy frames, find a stud with a stud finder and screw directly into it for a fixing that will hold for decades. Before drilling, check for pipes and electrical cables with a detector, and never drill directly above or below a socket or switch, because that is where cables most commonly run. If the plaster is crumbling or very old, consider adhesive strips for light frames instead of drilling at all.
Why does my picture keep tilting?
Your picture keeps tilting most often because it hangs from a single point, which lets the frame swing like a pendulum whenever someone walks past, closes a door, or brushes against the wall. The fix is to hang the frame from two points, either two hooks on the wall or two D-rings on the back of the frame, because a frame supported at two points cannot rotate. Small adhesive felt pads or rubber bumpers on the bottom corners also help, since they grip the wall slightly and stop the frame from swinging, while keeping the wire slack modest prevents the frame from sitting low and drifting. If the picture hangs from a sawtooth hanger, replacing it with two D-rings is usually the most effective single change you can make.